


Empower Your Web Development with Rust: The Future of Web Apps
Step into the forefront of web app development! Embrace the strength of Rust, a programming language revolutionizing web applications. Together, let’s unlock the power of Rust and its incredible capabilities.
Rust and Leptos: A Dynamic Duo for Web Development
Rust is celebrated for its safety and speed, revolutionizing web app development. Combined with Leptos, reminiscent of JavaScript frameworks like Solid, React, and Svelte, and Rust’s own Yew and Dioxus, Rust elevates its game. This duo makes Rust powerful and accessible, especially for those familiar with these frameworks.

Installing Rust: Your Gateway to Web App Innovation
Rust installation is your first step towards web development marvels, regardless of your operating system preference:
- Windows Users: Opt for the Windows Subsystem for Linux (WSL) or Rust’s official installer.
- macOS Enthusiasts: Utilize Homebrew, a package manager, for installing Rust.
- Linux Advocates: Install Rust through package managers or the official installer.
Begin your Rust journey:
- Open a terminal.
- Download the installer:
- For Linux and macOS:
curl --proto '=https' --tlsv1.2 -sSf https://sh.rustup.rs | sh - For Windows: Download and execute the installer from Rust’s website.
- For Linux and macOS:
- Follow the installation instructions, including adding Rust to your system’s PATH.
- Verify your installation with
rustc --versionandcargo --versionin a new terminal window.
Installing Trunk: Enhancing Your Rust Experience
Trunk, a web assembly application bundler for Rust, is your next step. Install Trunk via Cargo and confirm its installation:
- Open a terminal.
- Install Trunk with
cargo install trunk.- Verify the installation with
trunk --version.
- Verify the installation with
Starting Your Project with Cargo
Cargo streamlines the creation and management of your new Rust project:
- Open a terminal.
- Create your project:
cargo init awesome-web-app. Cargo will create a new directory with this name and set up a basic Rust project structure inside. - Navigate to the new directory:
cd awesome-web-app. - Familiarize yourself with Cargo’s default project structure, including the
src/directory andCargo.toml
Integrating Leptos into Your Project
Easily integrate Leptos into your project:
- In your terminal, in the project directory, add Leptos as a dependency with
cargo add leptos --features=csr. This command adds the Leptos crate to your project with the specified feature, “csr”. - Update dependencies with
cargo update: Upon adding the Leptos crate, Cargo automatically updates yourcargo.tomlfile with the new dependency entry.
Adding the wasm32-unknown-unknown Target
To compile code to WebAssembly for browser compatibility:
- Ensure Rustup is installed.
- Add the target:
rustup target add wasm32-unknown-unknown. - Verify the addition with
rustup target list.
Building Your App with Leptos:
Start by creating a basic index.html in your project’s root directory:
<!DOCTYPE html>
<html>
  <head></head>
  <body></body>
</html>
Add a “Hello, world!” message in main.rs:
use leptos::*;

fn main() {
    mount_to_body(|| view! { <p>"Hello, world!"</p> })
}
Launch and view your app at http://127.0.0.1:8080/ with trunk serve --open.
Adding Interactivity: The Rust Way
Let’s spice things up with an interactive counter component.
- Define a
Buttoncomponent inmain.rsthat updates a counter when clicked. - Implement the counter logic using Rust’s
create_signalfunction.
use leptos::*;

#[component]
fn Button() -> impl IntoView {
    let (count, set_count) = create_signal(0);

    let handle_counter = move |_| {
        set_count.update(|n| *n += 2);
    };

    view! {
        <div>
            <h2>{move || count.get()}</h2>
            <button on:click=handle_counter>"Click me!"</button>
        </div>
    }
}
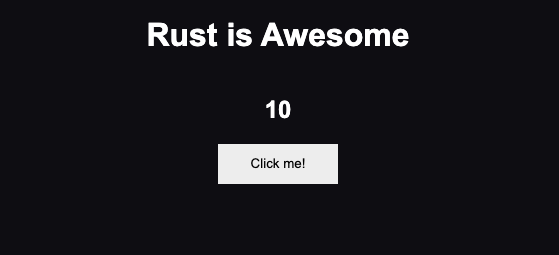
The App component is composed of a header stating “Rust is Awesome” and an instance of the Button component.
...

#[component]
fn App() -> impl IntoView {
    view! {
        <h1>"Rust is Awesome"</h1>
        <Button />
    }
}

...
Here is the full code, if you want to copy it:
use leptos::*;

#[component]
fn Button() -> impl IntoView {
    let (count, set_count) = create_signal(0);

    let handle_counter = move |_| {
        set_count.update(|n| *n += 2);
    };

    view! {
        <div>
            <h2>{move || count.get()}</h2>
            <button on:click=handle_counter>"Click me!"</button>
        </div>
    }
}

#[component]
fn App() -> impl IntoView {
    view! {
        <h1>"Rust is Awesome"</h1>
        <Button />
    }
}

fn main() {
    mount_to_body(App)
}
Styling Your App: The CSS Touch
For that stylish look, add leptos_meta as a dependency and create a CSS file with your desired styles. Then, integrate these styles into your Rust components to bring them to life!
cargo add leptos_meta --features=csrNow, create a css file style/output.css with this code:
body {
  background-color: #0b0a11;
  font-family: Arial, Helvetica, sans-serif;
}

main {
  margin: 0 auto;
  max-width: 600px;
  text-align: center;
  color: white;
}

.counter {
  display: flex;
  flex-direction: column;
  justify-content: center;
}

.counter button {
  height: 40px;
  width: 120px;
  border: 0;
  margin: 0 auto;
}
Here is the full code:
use leptos::*;
use leptos_meta::*;

#[component]
fn Button() -> impl IntoView {
    let (count, set_count) = create_signal(0);

    let handle_counter = move |_| {
        set_count.update(|n| *n += 2);
    };

    view! {
        <div class="counter">
            <h2>{move || count.get()}</h2>
            <button on:click=handle_counter>"Click me!"</button>
        </div>
    }
}

#[component]
fn App() -> impl IntoView {
    provide_meta_context();

    view! {
        <main>
            <h1>"Rust is Awesome"</h1>
            <Button />
        </main>
    }
}

fn main() {
    mount_to_body(App)
}
Conclusion: The Power of Rust in Web Development
You’ve now built a functional, stylish web application with Rust. This is just the beginning of your journey with Rust. Keep exploring and innovating to realize the full potential of your web development skills with Rust.
